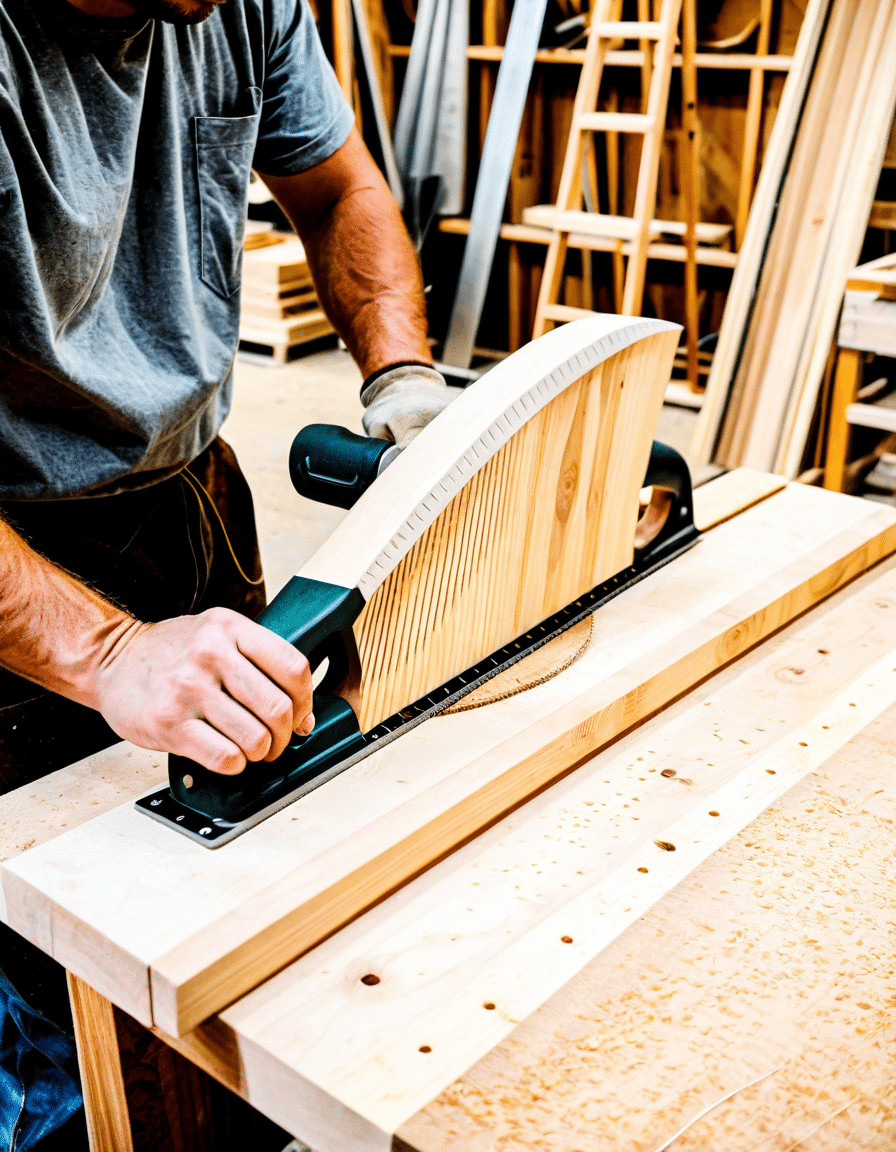
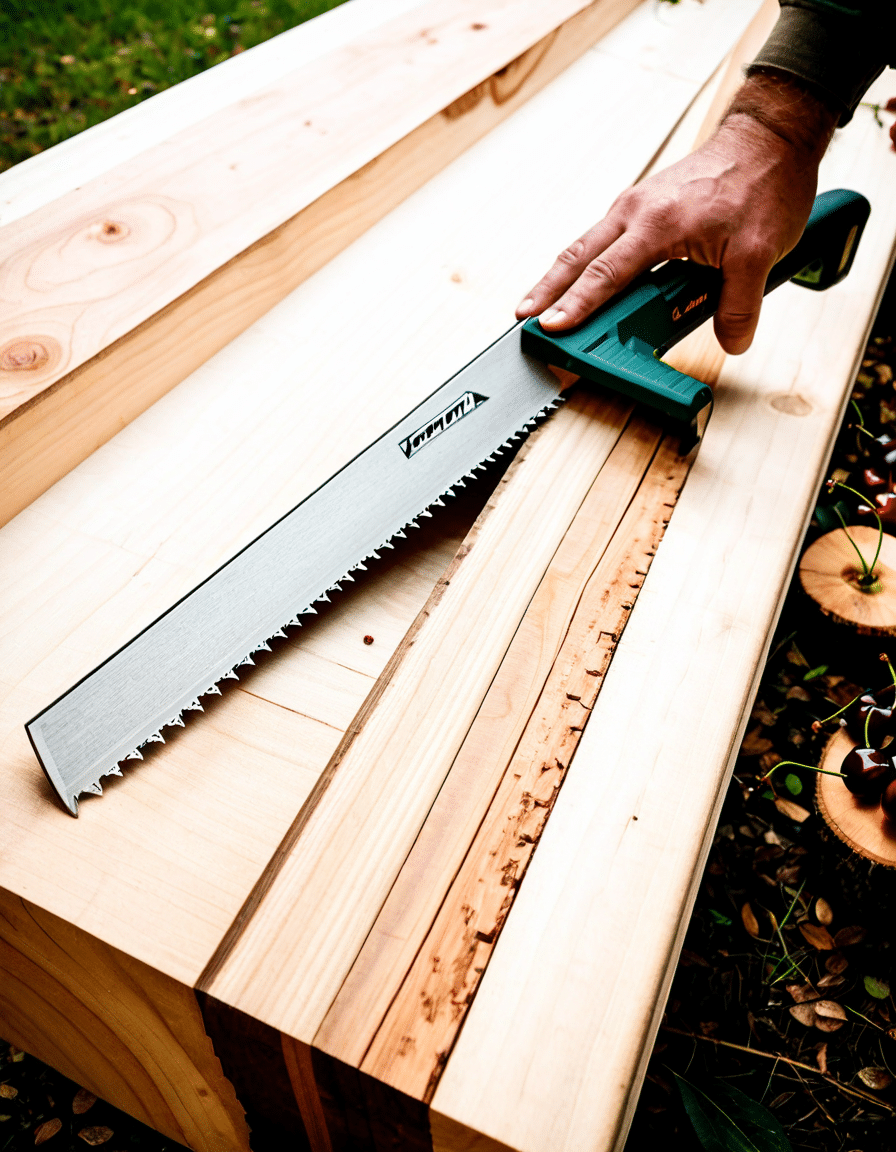
Hand saws might seem like an old-school tool in a swanky world filled with power saws, but let me tell ya, they’ve got their charm and precision that no electric saw can replicate. Whether you’re a seasoned woodworker or just dipping your toes into the art, mastering hand saw techniques can be the key to elevating your craft. Here’s the lowdown on seven game-changing hand saw techniques that’ll help you execute your woodworking projects like a pro, all while enjoying the satisfying simplicity of cutting wood by hand.

Mastering the Hand Saw: 7 Essential Techniques for Woodworkers
1. Perfecting the Rip Cut
Getting the hang of rip cuts is foundational for any woodworker. This ain’t just about cutting a board; it’s about aligning your saw blade to split the wood along the grain. For this job, the Disston D-8 Rip Saw is your best bud. With those aggressive teeth, it’ll slice through thick boards faster than you can say “wow.”
To nail a rip cut, practice makes perfect. First, mark your line clearly, then keep the saw at a consistent angle. By doing this, you’ll see your speed and accuracy shoot through the roof. It’s like learning to hit a 3-point shot in basketball; once you find your rhythm, everything else falls into place.
2. Mastering Cross-Cuts with Precision
Next up is cross-cutting, where you’re slicing through the grain rather than with it. Here, the Lie-Nielsen 5 ½ Crosscut Saw shines, thanks to its finely sharpened teeth that prevent the dreaded self-digging. You don’t wanna ruin a good piece of wood, do ya?
Start your cut with a kerf (a thin groove to guide your saw) for stability. Remember, let the saw do its thing—no need to muscle through it. If you force it, you’ll end up with uneven edges, and ain’t nobody got time for that.
3. Techniques for Dovetails
Ah, dovetails—beautiful, strong joints that impress everyone. When using a hand saw for dovetails, the Veritas Dovetail Saw is a real winner. Its tapered blade allows for amazing control, so you don’t get all wobbly on your cuts.
To begin, start your cut right from the marked line on the wood. The secret sauce? File the back of your saw blade gently to keep it from wandering. Trust me, this technique takes some practice, but the result will make you look like a woodworking ninja.
4. Sculpting with a Coping Saw
Doing curved cuts? Grab the Olfa P-705 Coping Saw; it’s the best thing since sliced bread. Unlike traditional saws, this little gem has a flexible blade that dances around tight turns and intricate designs.
Start slow and focus on following your line. This way, you keep the blade aligned with your intended shape and end up with a smooth finish. If you try to rush it, you might end up with a mess.
5. Achieving Accurate Angles with Miter Cuts
When it comes to miter cuts, especially for framing or adding decorative touches, a solid saw like the Narex Miter Saw will be invaluable. Set up a sturdy miter box to guide your cuts, so those angle cuts are on point—typically 45 degrees for corners.
Maintaining consistent pressure throughout the cut is key to achieving the tight-fitting joints we all dream about. After all, nothing says craftsmanship like perfectly fitted angles.
6. Refining Your Sawing Techniques with Safety Tips
Now, let’s chat safety. Working with hand saws calls for a mindset that’s all about keeping your fingers safe and sound. Stabilize your wood using clamps or a vice; a steady workpiece equals fewer accidents.
And here’s a pro tip: always use a push saw technique. Pulling the saw towards you gives you more control and precision. Don’t forget to keep your saw blade sharp; a well-honed blade is not only safer but also makes for cleaner cuts.
7. Finishing with a Ripping Technique
Once you’ve got your primary cuts all sorted, it’s time to refine your work. The Backsaw emerges as a champion for this task. Gently run the saw along the cut edge without applying too much pressure. Doing this corrects uneven surfaces without wrecking the timber grain.
Your finishing technique can turn a basic project into something visually stunning and professionally crafted.

Harnessing Hand Saw Techniques to Advance Your Craft
Despite the rise of fancy power tools, the hand saw remains a staple in the woodworking toolbox. Let’s face it: nothing gives you a connection to the wood quite like making each cut by hand. By integrating these techniques like proper cutting angles, joint creation, and refining finishes, you’re set to level up your woodworking game in no time.
So, why not dive in? Mastering the hand saw isn’t just about learning; it’s about forging a deeper connection between you and your craft. With effort and persistence, anyone can unlock their full woodworking potential, transforming every cut into a step towards excellence. Now, get out there and start Vibing with that wood—your future projects await!
For some fun facts while you’re at it, did you ever wonder How big Is Disney world The sprawling area that spreads across Florida is quite something to behold, but it’s nowhere near as riveting as the conversations you’ll conjure while building your next woodworking project. And when you’re not crafting, check out pop culture gems like Miss Scarlet And The Duke Season 4—it’s an engaging watch!
Mastering these hand saw techniques will not only boost your skills but also have you impressing friends, family, and maybe even that special someone. After all, what’s cooler than saying, “I made that” with a hint of pride? So grab your hand saw, and let’s get to work!
Hand Saw Techniques That Transform Your Woodworking Skills
Discovering the Hand Saw’s History
Did you know that the hand saw, a staple in woodworking, has roots that extend back over 5,000 years? Ancient Egyptians were already crafting wooden hand saws, using simple bronze blades to cut through wood. This tool has certainly stood the test of time, evolving from one generation to the next, and is still preferred by woodworkers today for its simplicity and precision. It’s remarkable how something as basic as a hand saw can accommodate the intricate designs in today’s woodworking projects, much like how artists might use tracing paper to sketch their next masterpiece.
The Art Behind the Cut
Using a hand saw isn’t just about applying force; it’s a blend of technique and finesse. The right grip and stance can make all the difference. For instance, don’t underestimate the importance of a good stance. You want to be stable and comfortable, which is crucial as you guide the saw through the wood. Much like utilizing a squat machine at the gym strengthens your core, mastering your posture while sawing enhances your control and effectiveness. Plus, the thrill of a well-executed cut is as satisfying as nailing a perfect shot on a basketball court!
Fun Facts to Inspire Your Craft
Feeling inspired? Here are some tidbits that might pump up your woodworking enthusiasm: The longest hand saw sold measured a whopping 32 feet! Imagine the projects you could tackle with something like that. Additionally, while hand saws are often seen as simple tools, they can give you a deeper understanding of wood grain and structure, akin to how exploring conditions like Bullous Pemphigoid can deepen our understanding of skin health. Learning to read wood can lead to incredible craftsmanship, ready to impress even the most discerning eyes—much like scoring bonus points on a travel reward program like United Mileage, opening doors to exciting adventures!
Experimenting with different hand saw techniques, staying patient during your learning process, and applying new grips or angles can radically enhance your skill set. A strong foundation in handling a hand saw equips you to tackle any woodworking project with confidence—after all, you’re crafting art, one cut at a time!